Procreate is probably the app I use the most and the first app I’ve downloaded when I got my iPad years ago. It’s been around 10 years now and let me tell you, this is the most unproblematic app ever. I bought it then, I think for around 10 dollars and that’s it. No other payment since. And it works perfectly fine, I never had any problem with it.
In this post, I’ll show you quickly the basic tools of Procreate first, and then the top 5 features that makes it a great app for architects and designers and how I use them in my daily works.
Don’t forget to also download the FREE cheat sheet that can help you learn this wonderful app.

Get subscribed to get your FREE guide now!

5 features that makes it great for architects and designers
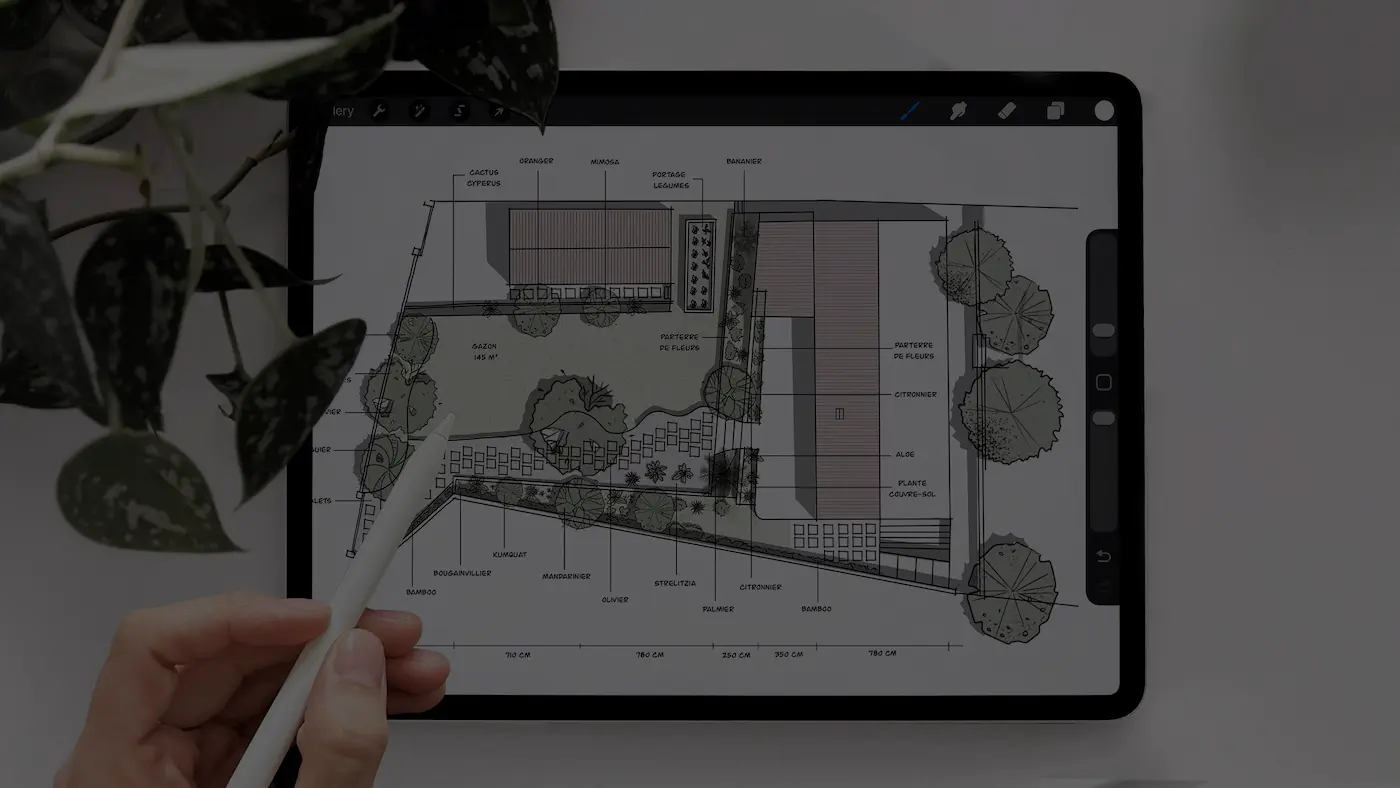
The Drawing Guides
Procreate’s drawing guides are like invisible helpers that make your drawings neat.
You can turn it on by going to Actions → Canvas and toggling on the Drawing Guide option. In the Edit Drawing Guide panel, you can find 4 different guides that you can adjust the grid’s color, opacity, thickness, and the grid size.
The 2D grid is particularly helpful if we want to draw to scale, all you have to do is to adjust the grid size. This provides an immediate visual reference for scale. You can ensure that a grid square represents a specific measurement, and draw accordingly.
When you enable the “assisted drawing” , you can draw perfectly parallel lines aligned with each one of the grid.

Custom Brushes
Procreate has already a lot of different brushes in it but if you want, you can import more and you can even create your own.
One of the ways I maximize the use of my iPad as an architect is with ready to use graphic templates or brushes I created myself. These are based on the things I use every single day, like people, tree brushes and some annotations to use in site analyses, concept diagrams, plans, and sections. For example, I have a brushset of annotations I like to use for site analysis or concept diagrams, and I have another brushset for drawing trees in sections and plans.
This has been a real productivity boost I gave myself. It saves time and it ensures consistency across all my diagrams. And I keep using them over and over again.
If you want to know more or access to my brushes, you can find them here.

Copy-Paste PNGs
As I did for my brushsets, I also have a ready-to-use PNG libraries that consists of furniture, plants, and different decoration objects. So, instead of having to draw the same object over and over again, all I have to do is to copy-paste those PNGs inside my drawing.
So what I did is I drew all of these once, and I keep them either on my photos library or on Procreate directly. If they are on my photo library, all I need to do is split my screen, and open the PNG library on the side of Procreate. From there, I just have to hold the image and slide it into Procreate directly, there you can resize it and place it correctly.
The other way you can do that, is by keeping your ready-to-use drawings in Procreate directly in your gallery, from where you can directly copy-paste it.

The Layers
One of the best features of working on the iPad is the ability to work in layers that let you stack parts of you drawing on top of each other. They let you paint things that overlap without altering work you’ve already done. And you can move, edit, recolor and delete things on one layer without changing anything on the other layers.
This is great because this let you experiment and organize different parts of your drawing. Also, sketching directly on photos has become my fastest way to communicate with contractors and clients, because this is very quick, very clear, and without the need for polished drawings.
I have some drawings which have so many layers, because I don’t want to risk messing up the whole thing just because I couldn’t draw the textures or the shadings right.

Alpha Lock & Clipping Mask
When you turn the Alpha Lock on for a layer, you are telling Procreate: “Only allow me to edit the pixels that are already visible on this layer and don’t let me draw anything on the empty areas.”
This is great for changing the color of something, to quickly recolor a line drawing or a shape without affecting the background. But also for adding texture or shading to a specific object you’ve already drawn.
And the other feature is Clipping Mask. This is a layer that “clips” to the layer under it. It uses the shape and transparency of the layer below as a mask. But not like the Alpha Lock, the Clipping Mask is a separate layer.
This is great for having your base shape on one layer and all your colors, textures, and shadows on separate layers above it, all clipped to the base. You can turn them on/off or adjust them independently.

So these were the 5 features I use every time on Procreate to create different kind of sketches and illustrations.
There are really a lot of things you can do with this app, let me know if you have any question or if I forgot another amazing feature.
If you’re interested in my design process and how I develop concepts for real projects, I’ve linked a video here, and if you want access to my brushes, you can download them there.